
Doom The Dark Ages 'Siege - Part 2' mission walkthrough (Chapter 7)
Doom The Dark Ages 'Siege - Part 2' finds a massive portal on the ground spawning a Titan that seeks to overrun the city of Teroth. A nearby Atlan, who is injured and lost one of its arms, comes to assist against this giant monster; however, it gets taken down easily. This Atlan mech is then used to take down the shields of Teroth, just after Doomslayer made his way back to the stronghold.
After having destroyed all Gore Portals in the battlefield outside Teroth, Slayer returns to the stronghold to assist as Ahzrak's forces begin to penetrate the walls.
Primary Objectives of Chapter 7 - Doom The Dark Ages 'Siege - Part 2'
Let us go over all the primary objectives in Chapter 7 of The Dark Ages:
- Get to the Turret
- Fall Back to the Hangar
- Rescue Novik
Chapter 7 of Doom The Dark Ages is a continuation of Chapter 6 - Siege Part 1, and therefore, a relatively small section. Just like every other chapter, there are secrets to be found in Siege - Part 2, where you must go out of your way to explore and unlock the hidden items. Do take the time to explore every nook and cranny that isn't the primary objective to unlock these collectibles.
1) Get to the Turret
You will find yourself inside the metal gate that Doomslayer broke open to enter the walls of Teroth at the end of the last chapter. Commander Thira informs you of a turret that you can use to hold off the demons entering the main courtyard. Go straight ahead and then turn left to find the courtyard. Head to the turret and get active on it to show the forces of hell the true meaning of fear.
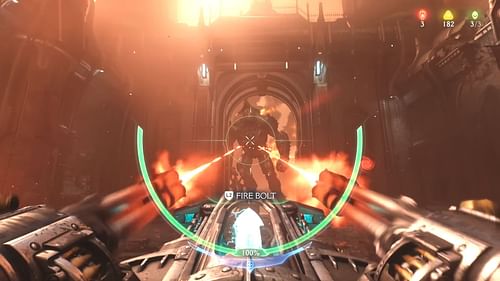
This turret has two forms of operation, where the primary fire guns down demons with bullets and it also charges a seconday meter. This meter in turn enables a bolt which can be fired at 100% charge. The bolt deals significantly higher damage and can take down multiple stronger targets.
Once you get on the turret, you will face multiple waves of demons with various types that need to be gunned down. After a while, the extremely large door in the courtyard will be broken down by a titan demon who intends to close the distance to you. Gun this demon down and shoot precisely with bolts to take him out.
However, be wary, as there will be additional demons that target you while the titan is in the scene. As soon as the titan gets taken down, head towards the left section of the courtyard to find your next primary objective in Siege - Part 2.
Also read: Do you need to play Doom Eternal before Doom The Dark Ages?
2) Fall Back to the Hangar
After coming down from the turret, head towards to left section and you will find a climbable wall and a barricade that can be shattered with your shield at the top. Head inside, defeat the mancubus here, and push the large metal block here towards the right, where it will break open a wooden section.

This will unlock a pathway towards the objective in the newly opened section and a secret area hidden behind its initial position. Climb up the metal block you moved and then along the wall to find yourself at the top of a long hallway. Keep heading straight and then turn right to jump across a gap.
Turn right and jump across, destroy the demons, and head towards the balcony to find a green switch that opens up a door on the other end of the courtyard.

You will also find a few secrets here before heading down and back into the starting section. Head across the courtyard to the other end, and you will enter a room where a demon horde is waiting for you. Smash your bloody knuckles through their skulls to find a climbable wall at the back of this hall, around some broken debris.

Climb up and keep heading torwards the objective marker through the hellspawns that block your way.Follow the markers all through the rooms and courtyards of the castle to go up some flight of stairs and find a glowing key at the other end of the topmost level.
This key unlocks the pink secret gates in the initial courtyard of Siege - Part 2. Reach the final objective marker to find yourself at a lift, which completes this primary objective.

3) Rescue Novik
After the lift brings you down, head left and then up the walls towards the objective marker, almost 200m away. Demons along the way will want to delay you, but the Doomslayer does not back down. Chop your way through anything that dares cross your path. This region will be recognizable as it was once the initial stronghold that Doomslayer was dropped into back at the start of Chapter 6.

Make your way through the debris and metal walls that can be shattered with your shield to drop down onto another horde of fodder demons. Upon reaching further ahead, you will need to climb up a platform and head through a broken wall to break a metal chain. This will bring a high platform down to a level where you can reach it. This will bring you to the final major horde in Siege - Part 2.

Climb up all the way to come across another level of the hanger, which has been completely demolished and overrun by demons. Complete this large encounter and then head up the wall of a small crane that resides beside the large gap you are expected to cover. Head to the end of the platform on top of this crane to find a green statue at the other end, which will allow you to jump across.
In this area, you will find a Sentinel Shrine, following which you must head towards the lift. After this, a cutscene will start playing and you will have ended Doom The Dark Ages 'Siege - Part 2.'
For more Doom The Dark Ages guides, follow Sportskeeda:
- Doom The Dark Ages review
- Is Doom The Dark Ages a standalone title?
- Is Doom The Dark Ages coming to PS4 and Xbox One?